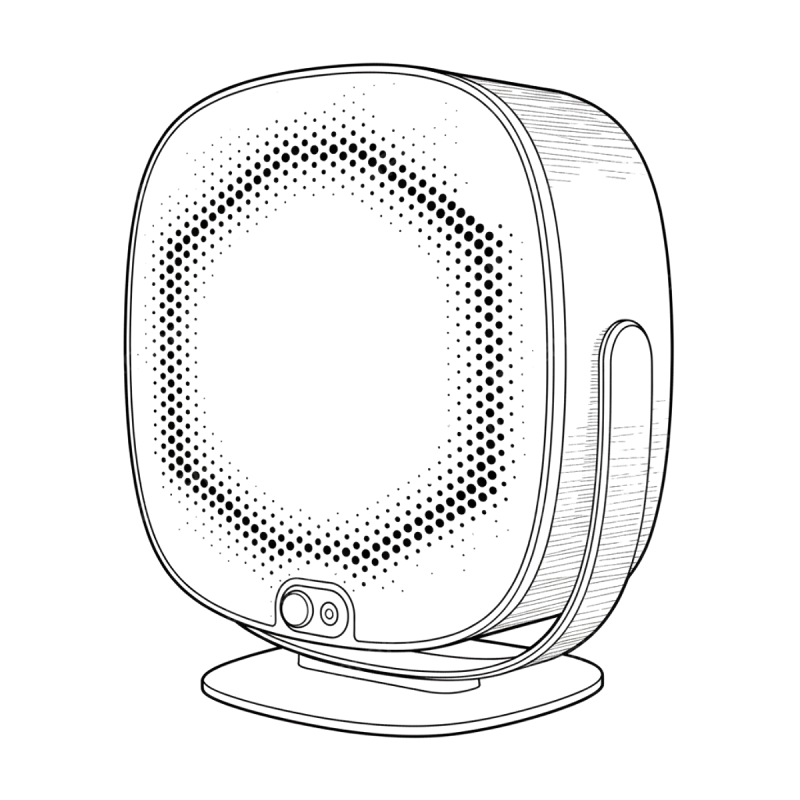
Figure 1: The Lima Shield, three-quarter view

Install your Lima Shield.

Setup is done entirely in the Lima Shield Connect app. It takes 5 to 10 minutes.

Have these to hand:

  • The Lima Shieldand the power cable supplied
  • A power socketnearby
  • Your smartphonewith Bluetooth turned on
  • Your 2.4 GHz Wi-Fi and its passwordor an Ethernet cable connected to your router
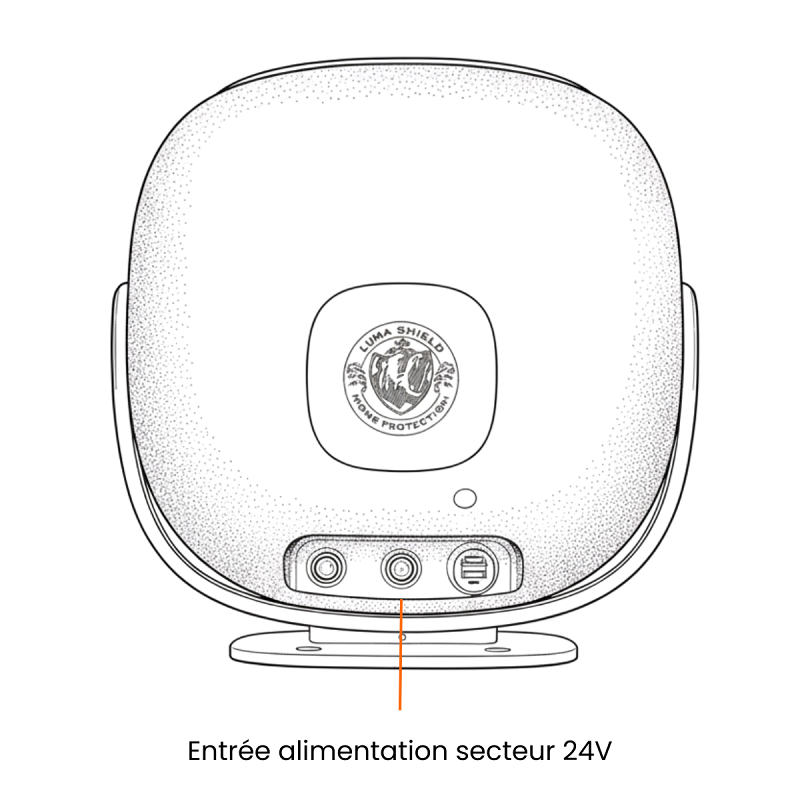
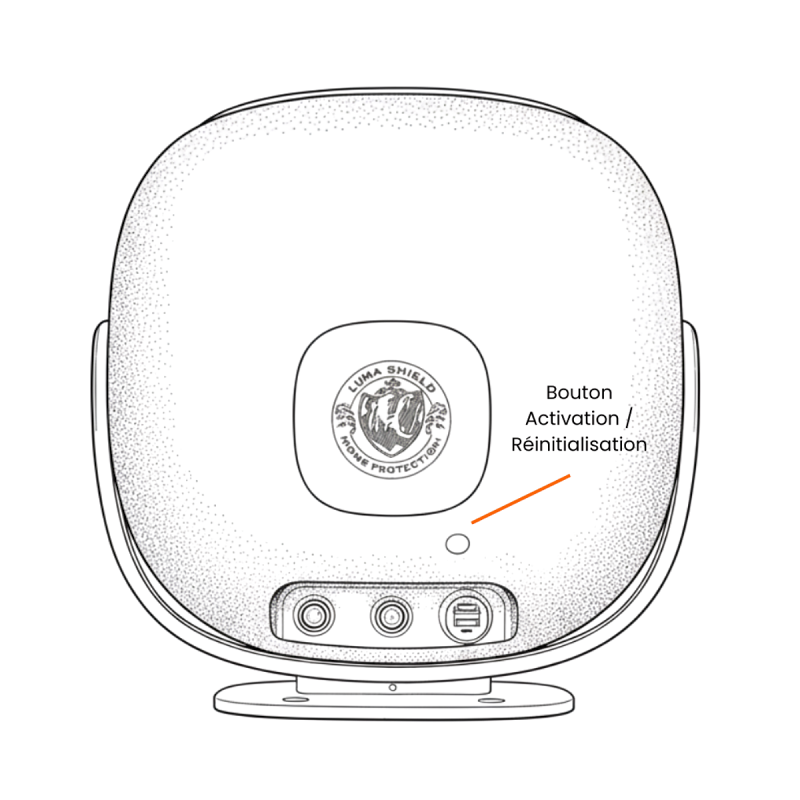
Figure 7: The mains power port on the back of the Lima Shield

Plug in the Lima Shield.

Take it out of its packaging and place it on a flat surface, near a socket. Connect the supplied cable to the back of the Lima Shield, then to the wall socket.

Figure 27: The power button on the back of the Lima Shield

Switch it on.

Press and hold the button on the back of the Lima Shield for at least 3 seconds.

Its LED lights up white.

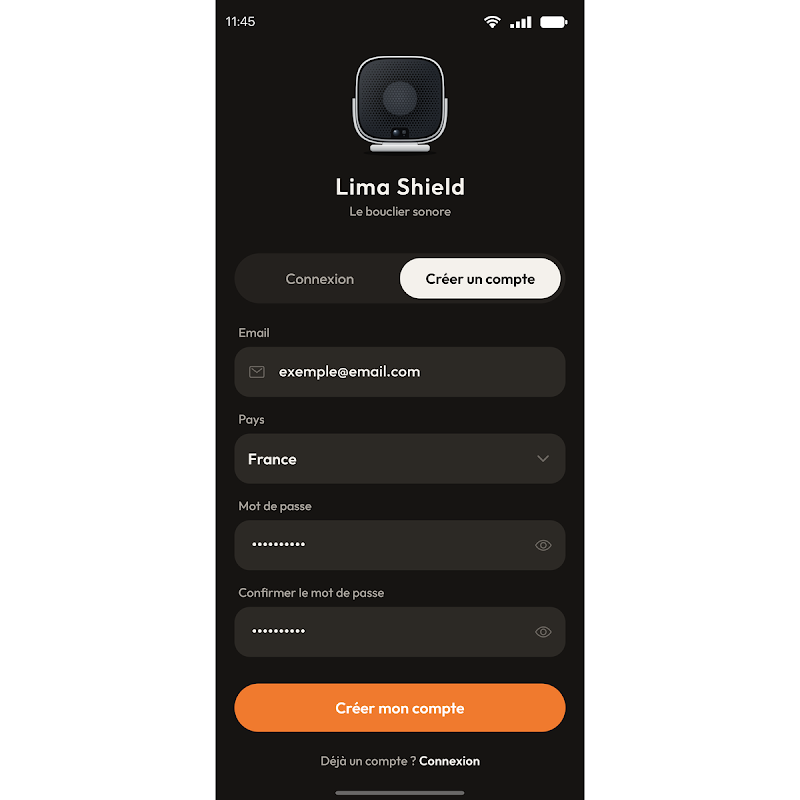
Figure 10: The account creation screen in the app

Install the app.

Download Lima Shield Connect, open it and tap “Create an account”. Enter your email, your country and a password, then tap “Create my account”. Then allow notifications: that is how you are alerted in the event of an alarm.

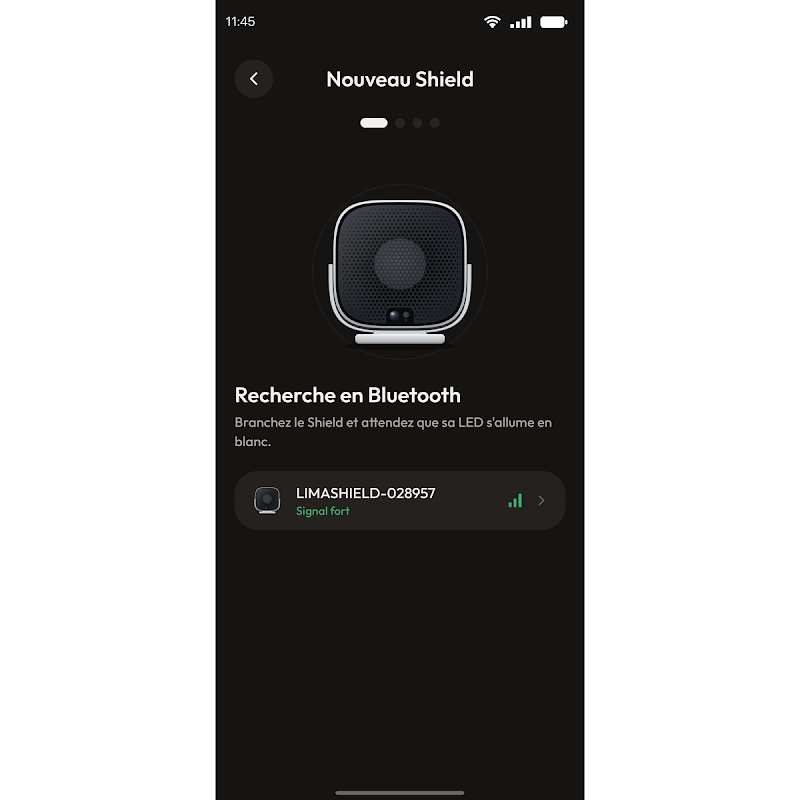
Figure 13: List of Lima Shield units detected over Bluetooth
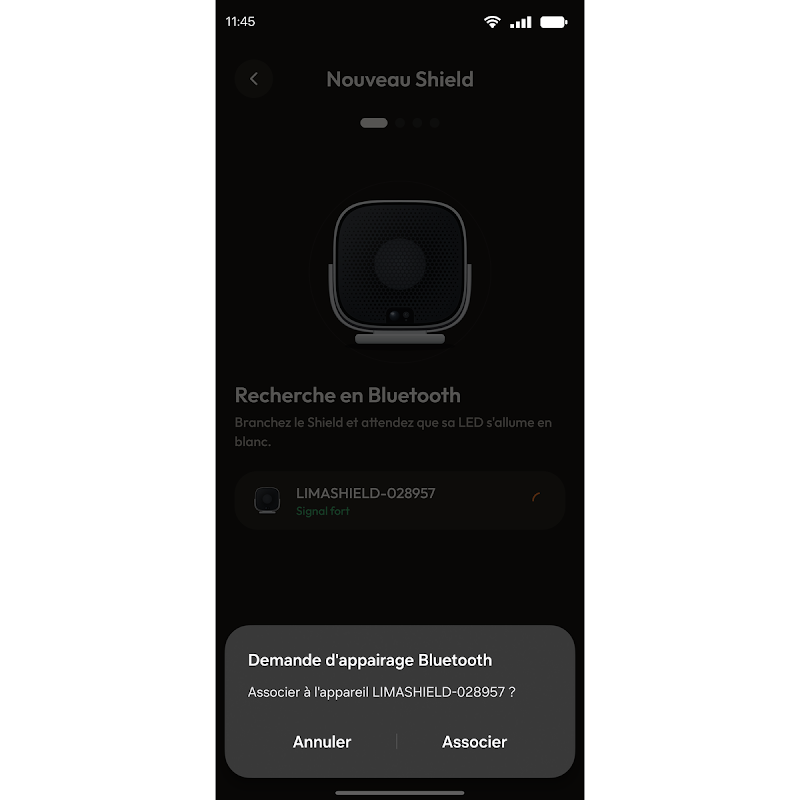
Figure 14: The phone's Bluetooth pairing request

Add your Lima Shield.

In the app, tap “Set up a Lima Shield” and turn on your phone's Bluetooth if prompted. You do not need to activate anything on the Lima Shield itself: stay within 5 metres, in the same room. Then select it in the list (its name starts with LIMASHIELD) and tap “Pair”.

No Lima Shield showing?

After 30 seconds, check that the Lima Shield is plugged in and switched on with a white LED, that you are within 5 metres in the same room, and that it is not already set up on another account. Then tap “Search again”.

How does it connect to the internet?

Make the same choice in the app, then tap “Continue”. Either way, 4G takes over if the connection drops.

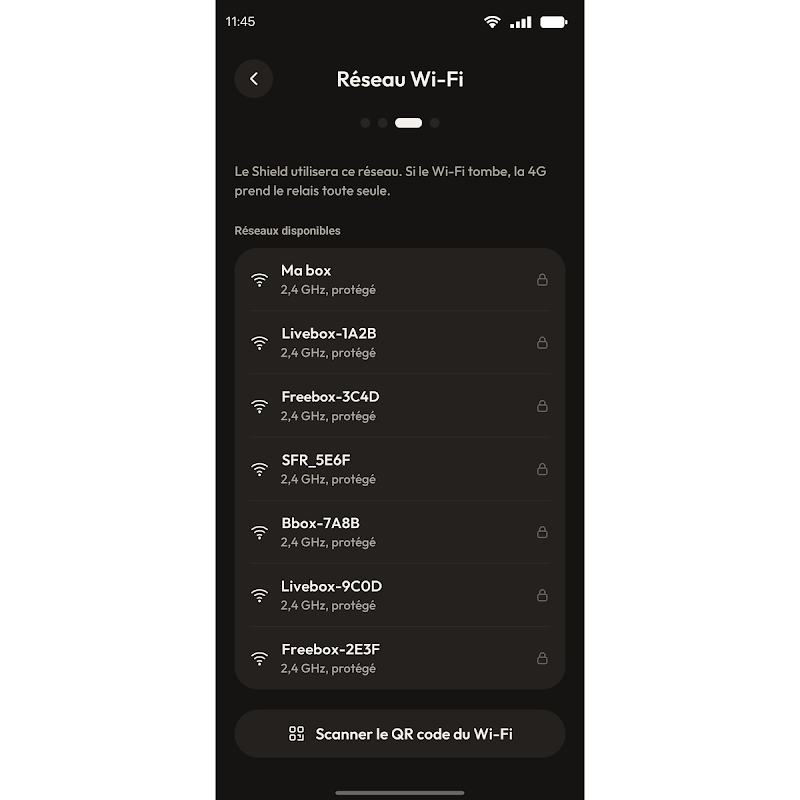
Figure 16: Choosing the Wi-Fi network
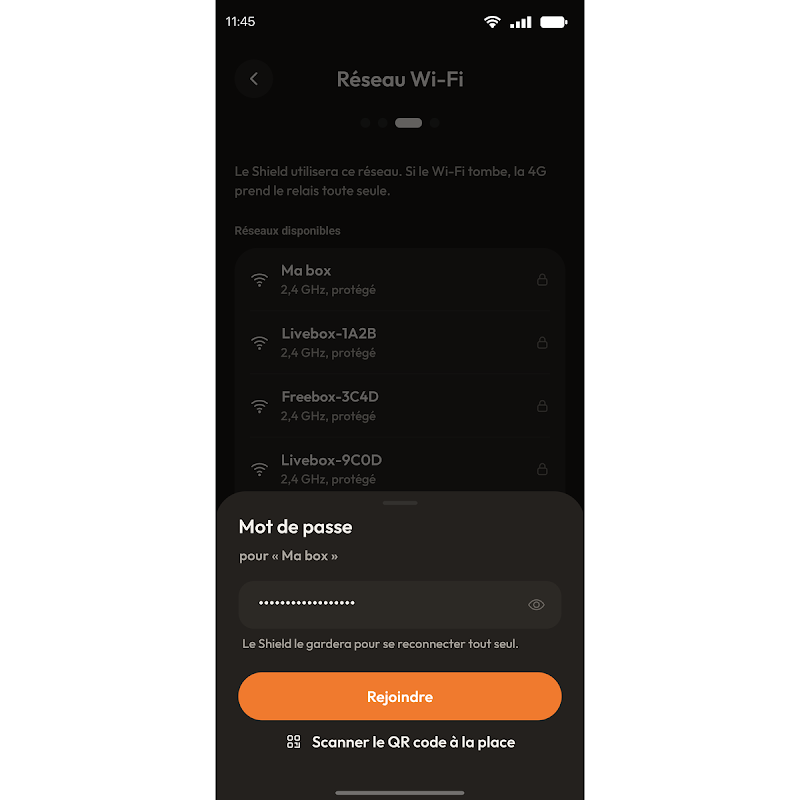
Figure 17: Entering the network password

Connect it to your Wi-Fi.

Choose your network, enter its password and tap “Join”. You can also scan your router's QR code.

Network not showing?

The Lima Shield only picks up 2.4 GHz Wi-Fi: check that your router is broadcasting on 2.4 GHz.
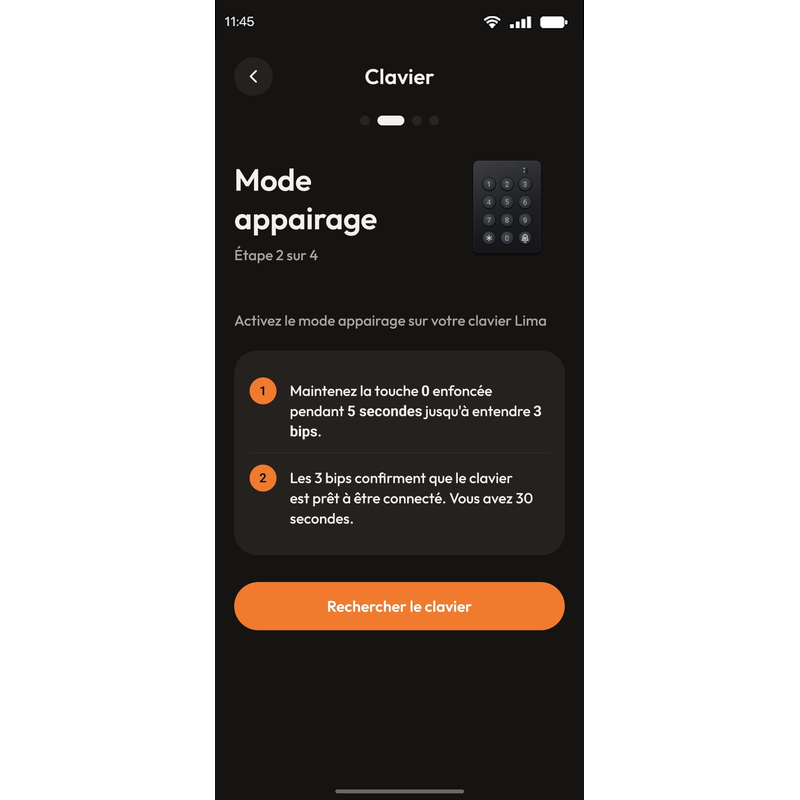
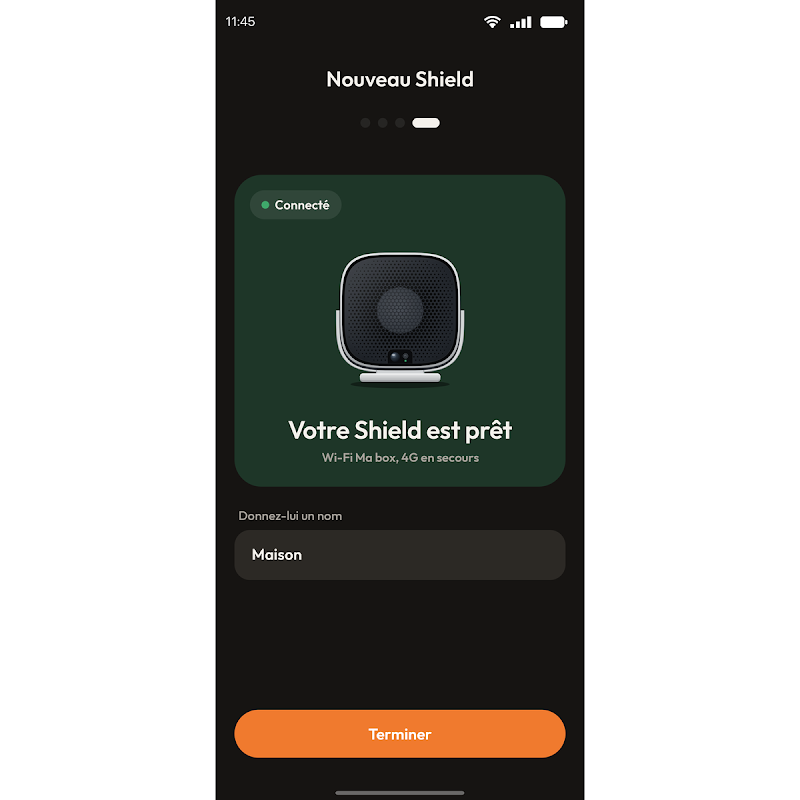
Figure 18: The “Your Shield is ready” screen

Finish in the app.

The Lima Shield checks its connection. When “Your Shield is ready” appears, give it a name if you wish, for example Home, then tap “Finish”.

If an update is offered, tap “View update” to install it, or “Later”. Do not unplug the Lima Shield during the update.

All done.

The Lima Shield is connected and disarmed: its status LED is solid white.

You can also:

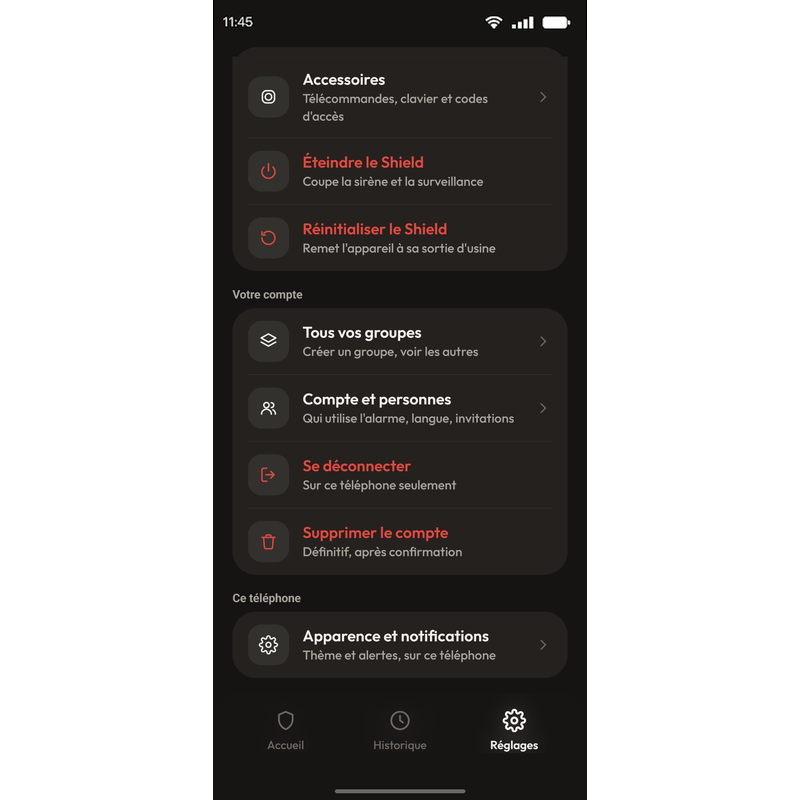
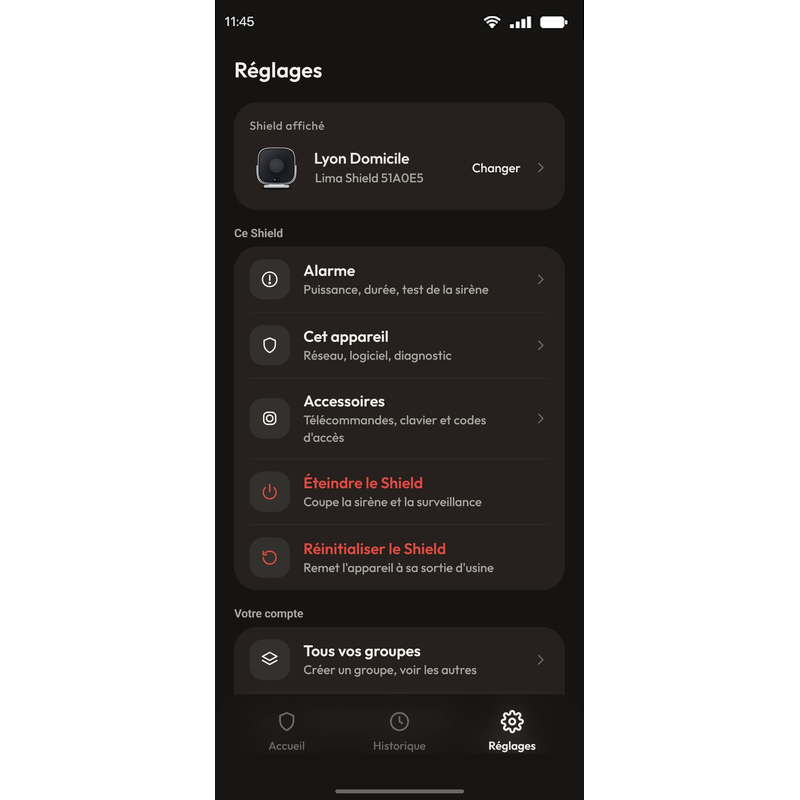
Figure 56: The “Settings” tab, “Account and people” section
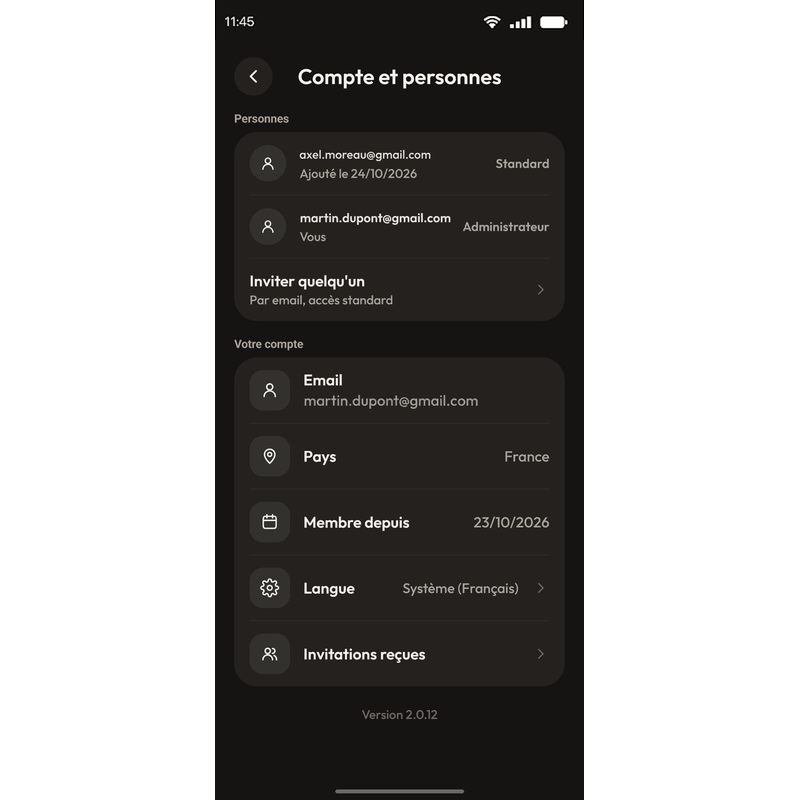
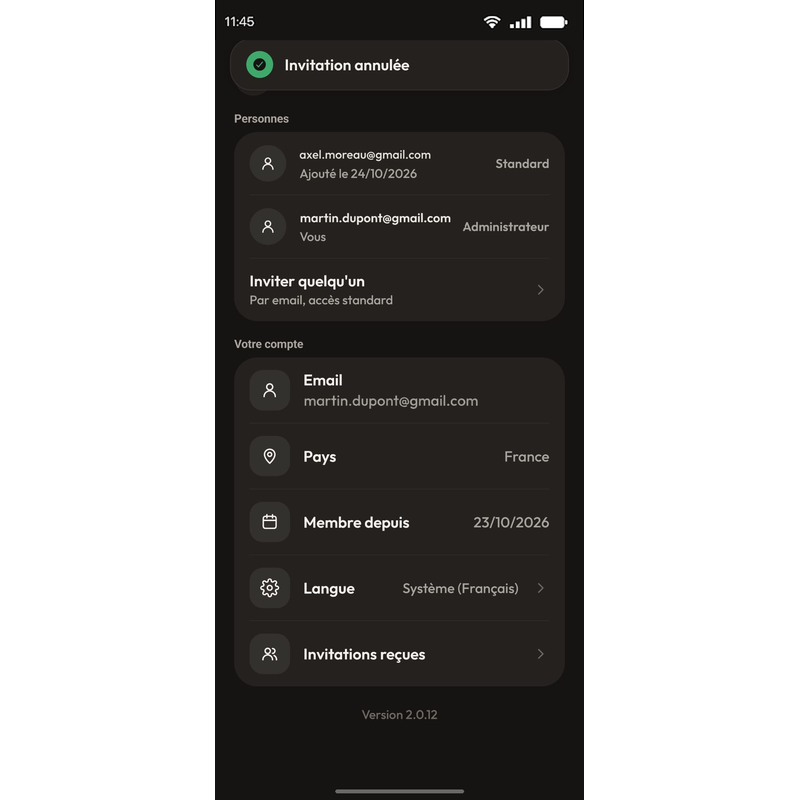
Figure 34: The “Account and people” screen

Add a contact.

In “Settings”, tap “Account and people”, then “Invite someone”.

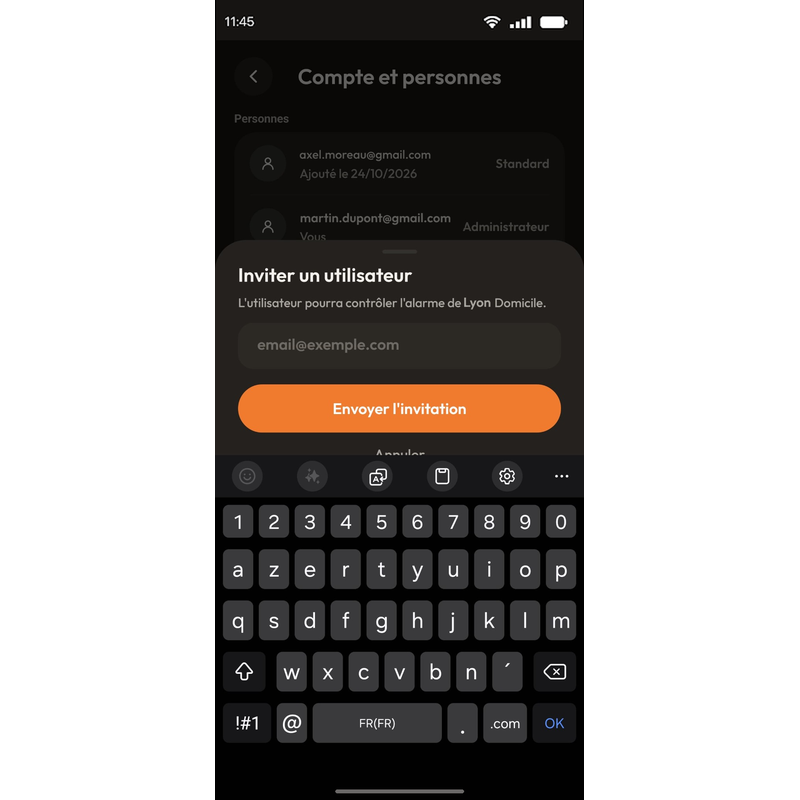
Figure 35: The “Invite a user” window

Enter their email.

Enter the person's email, then tap “Send invitation”. They will be able to arm and disarm your Lima Shield and view the history, but not change its settings.

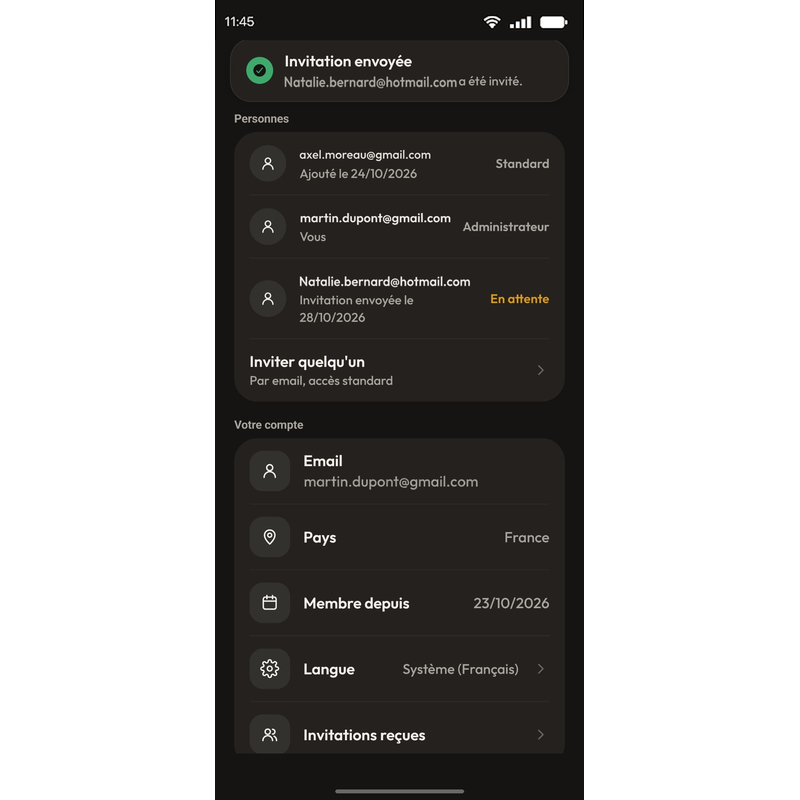
Figure 36: Invitation sent, the person appears as “Pending”

The invitation has been sent.

The person appears as “Pending”. They create their account in the app with that email, then tap “Accept invitation”.

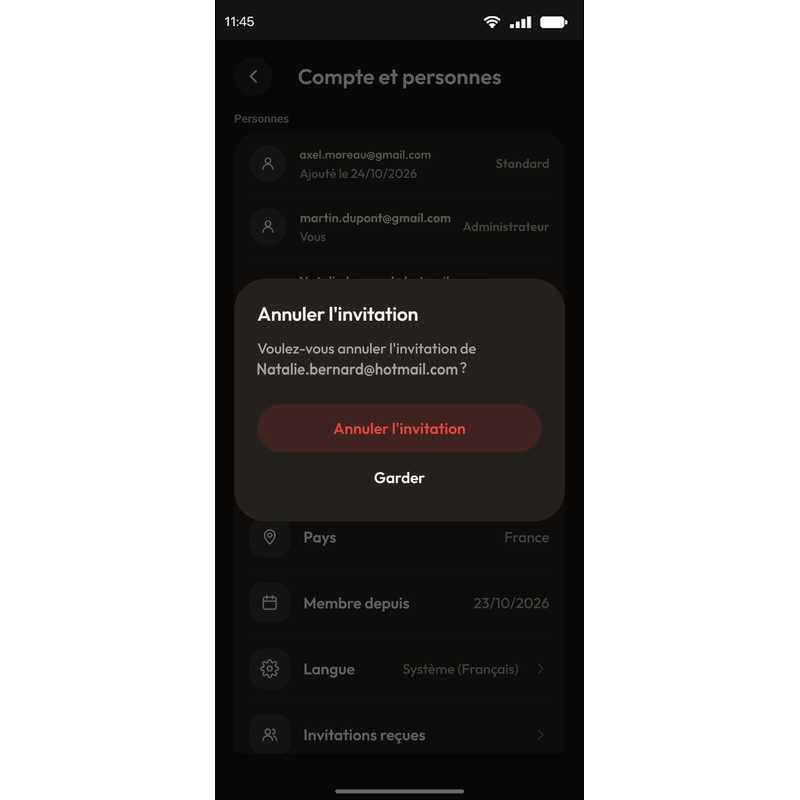
Figure 37: The “Cancel invitation” window
Figure 38: Invitation cancelled

Wrong address?

Open the pending invitation, then tap “Cancel invitation”.

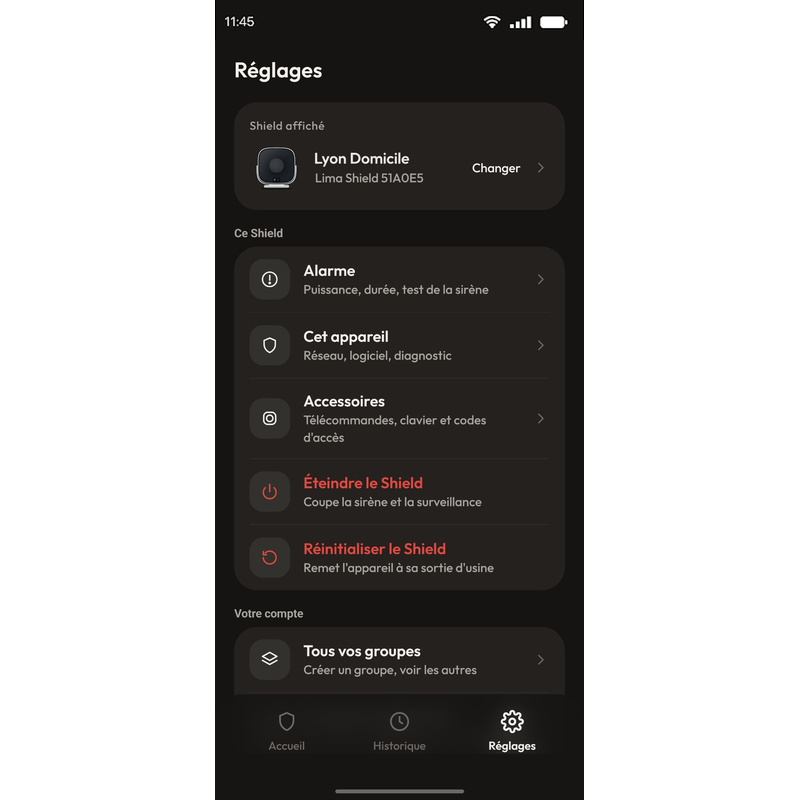
Figure 39: The “Settings” tab, “Accessories” section
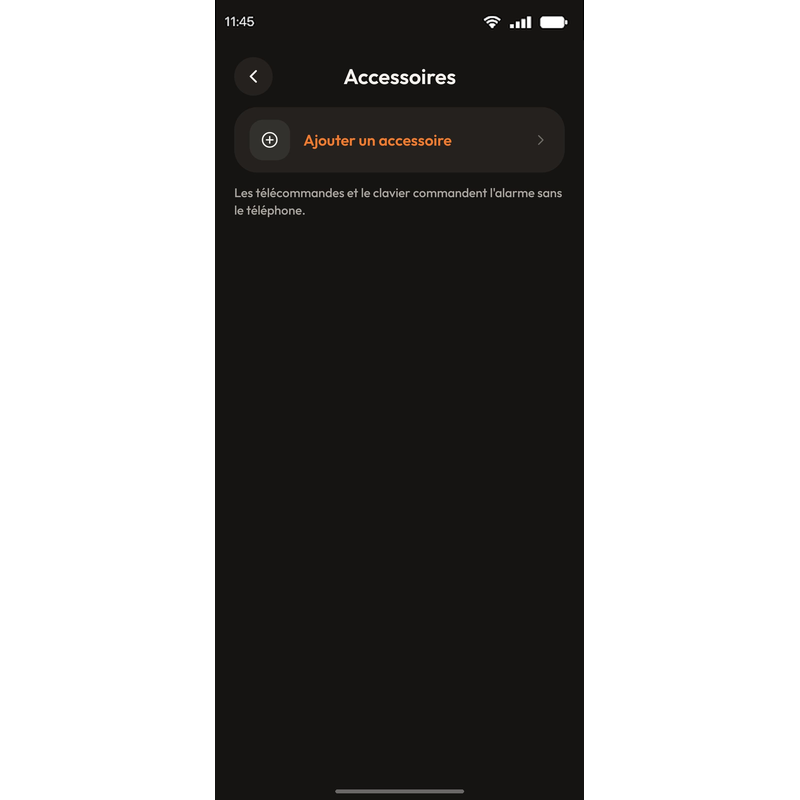
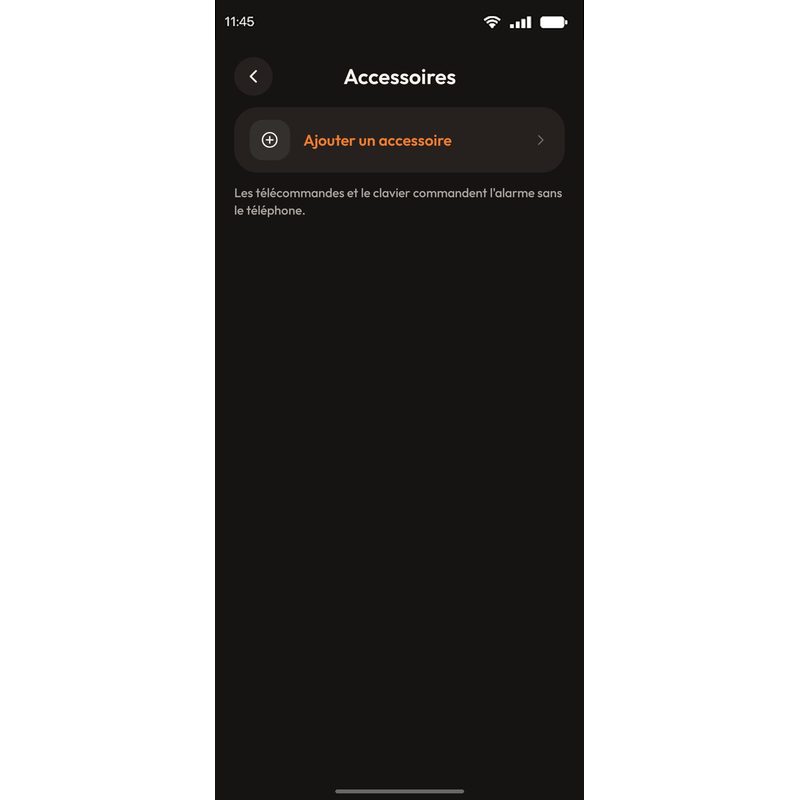
Figure 40: The “Accessories” screen with “Add an accessory”

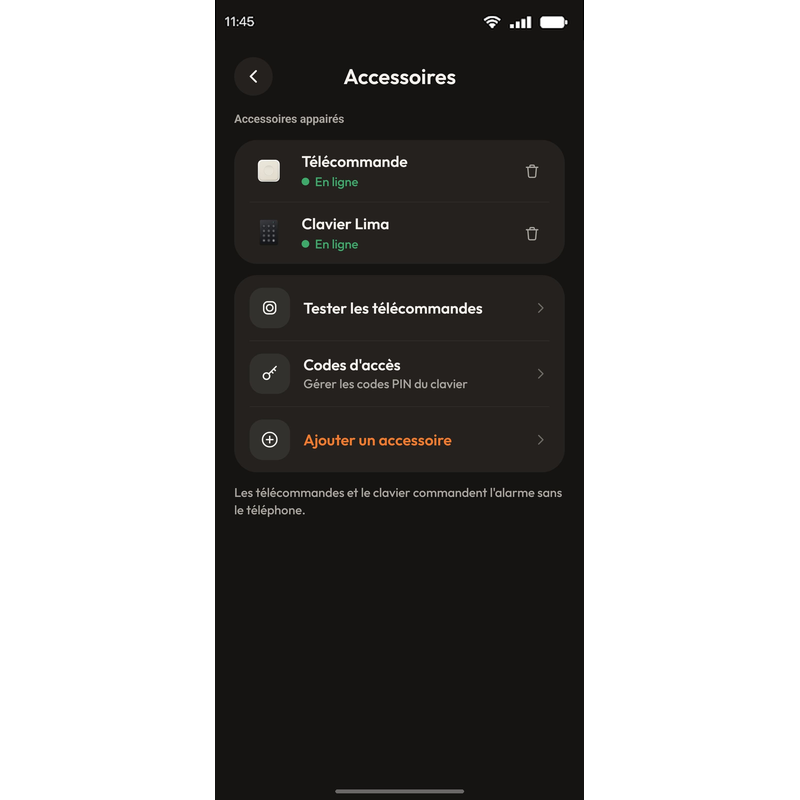
Add a button.

In “Settings”, tap “Accessories”, then “Add an accessory”.

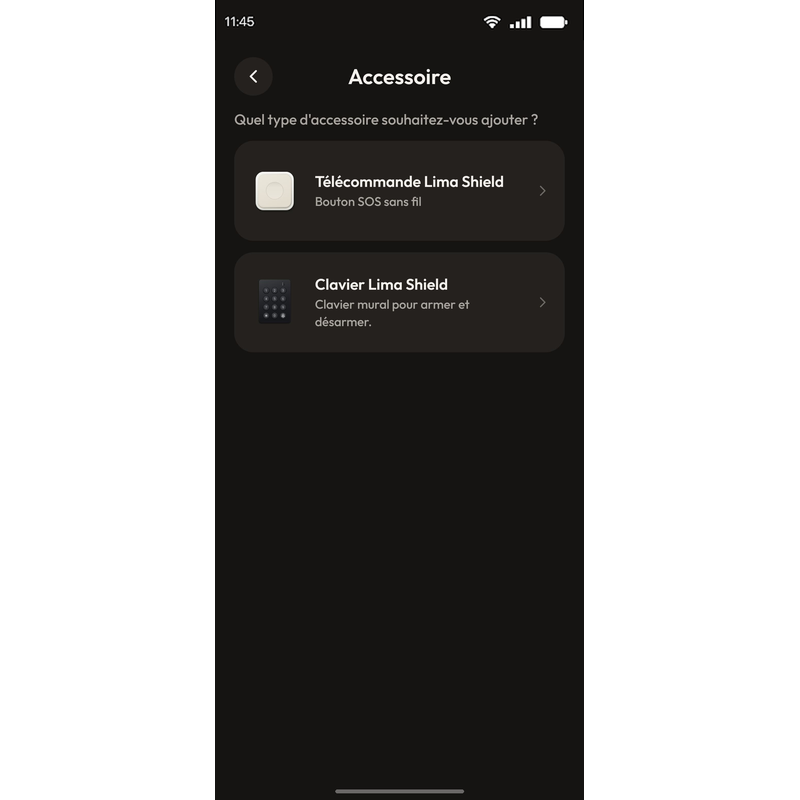
Figure 41: Choosing the accessory type

Choose the remote control.

Tap “Lima Shield Remote”, the wireless SOS button.

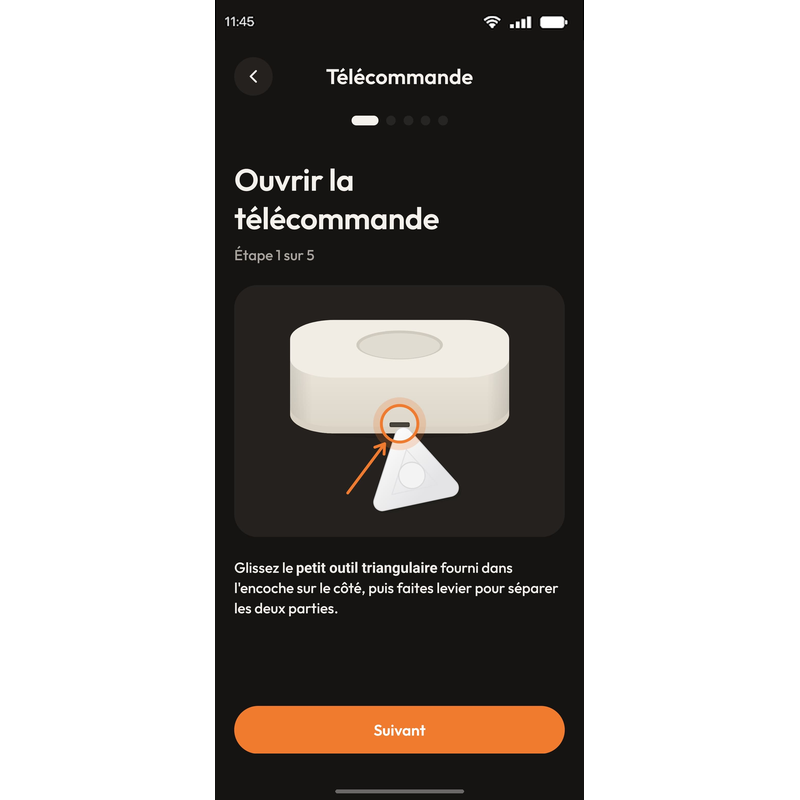
Figure 42: Opening the remote control, step 1 of 5

Open the remote control.

Slide the small triangular tool supplied into the notch on the side, then lever the two halves apart.

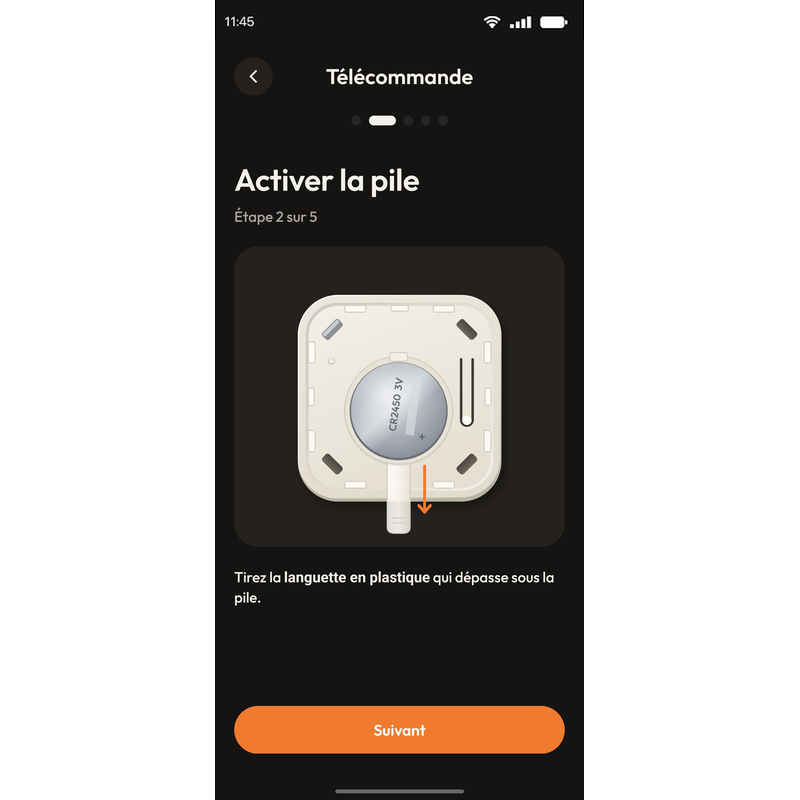
Figure 43: Activating the battery, step 2 of 5

Activate the battery.

Pull out the plastic tab sticking out from under the battery.

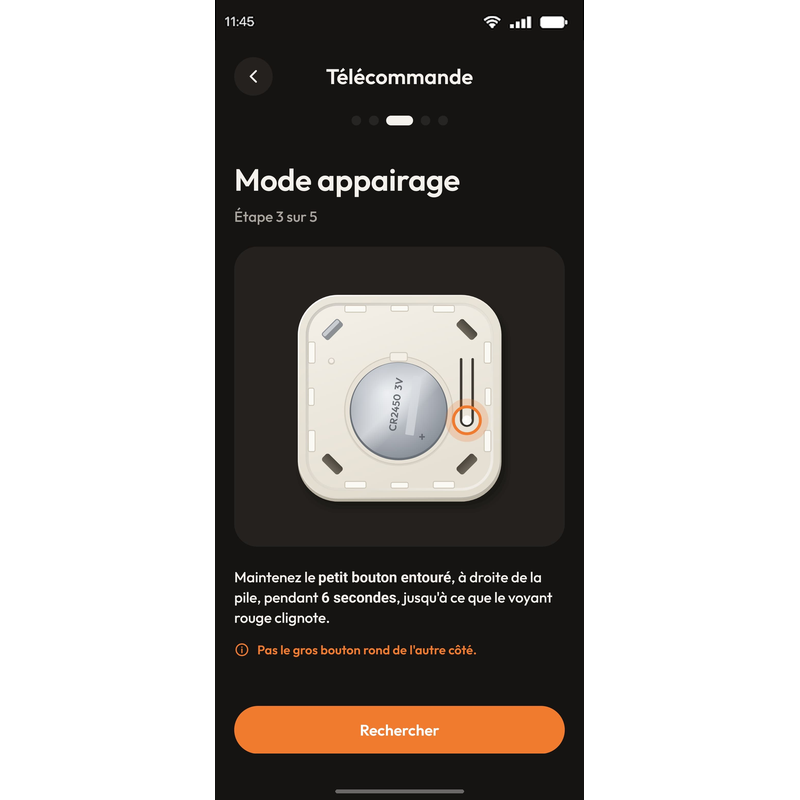
Figure 44: Remote control pairing mode, step 3 of 5

Put it in pairing mode.

Hold down the small circled button, to the right of the battery, for 6 seconds, until the red light flashes. Then tap “Search”.

Not the big round button on the other side.

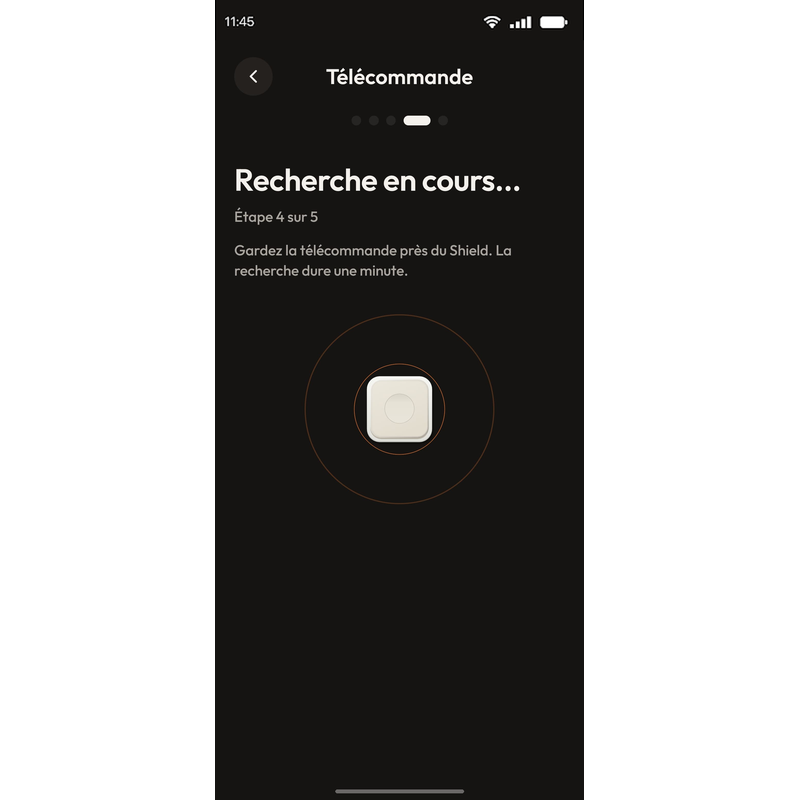
Figure 45: Searching for the remote control, step 4 of 5

Keep it close to the Lima Shield.

The search takes one minute.

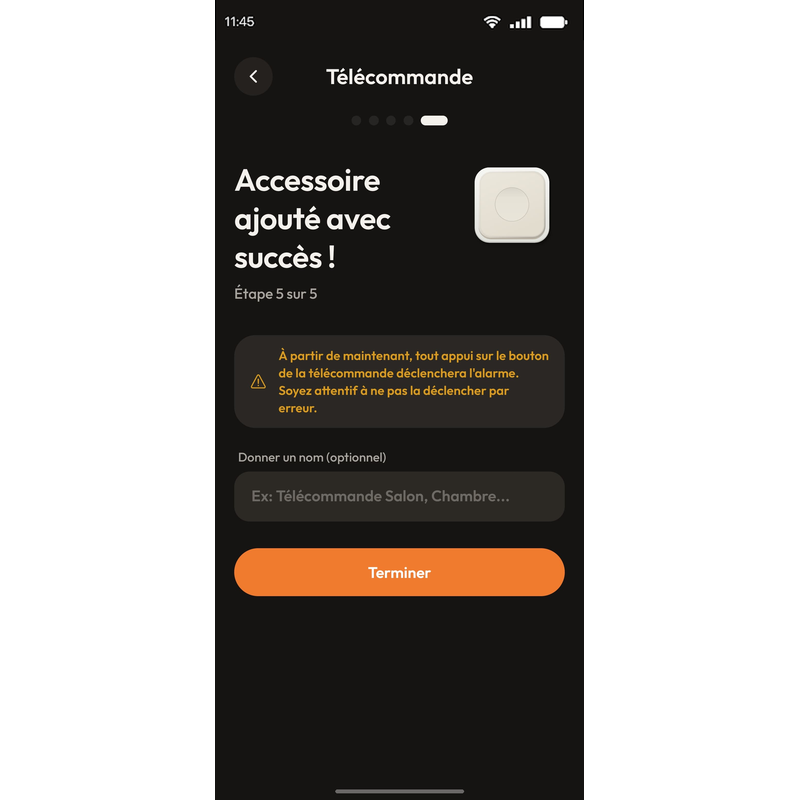
Figure 46: Remote control added, step 5 of 5
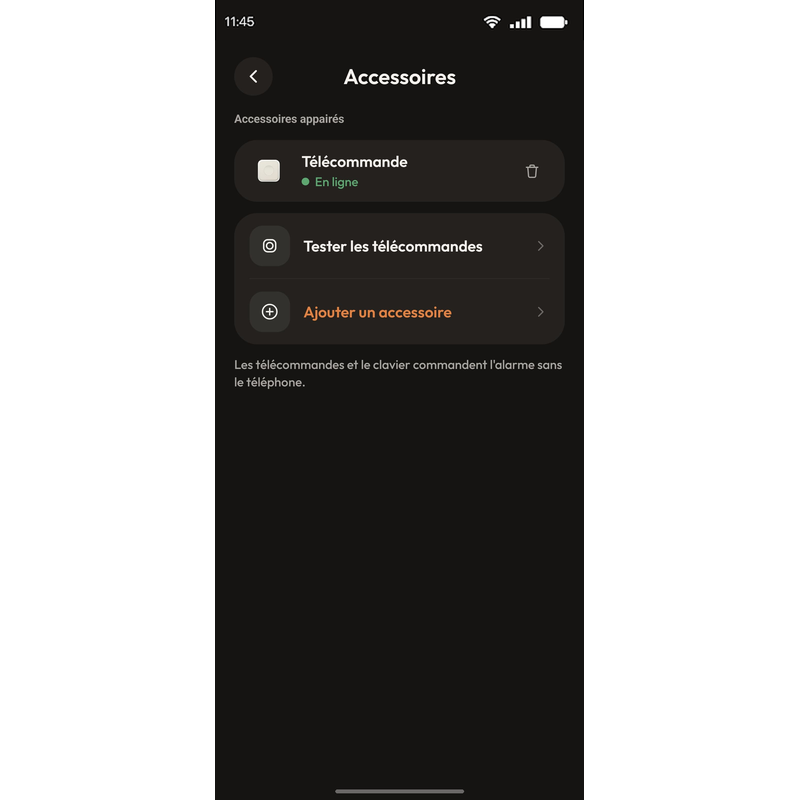
Figure 47: The remote control in the accessories

The remote control has been added.

Give it a name if you wish, then tap “Finish”. It appears in your accessories.

From now on, any press of the remote control button triggers the alarm: take care not to set it off by mistake.

Figure 48: The “Settings” tab, “Accessories” section
Figure 49: The “Accessories” screen with “Add an accessory”

Add the keypad.

In “Settings”, tap “Accessories”, then “Add an accessory”.

Figure 50: Choosing the accessory type

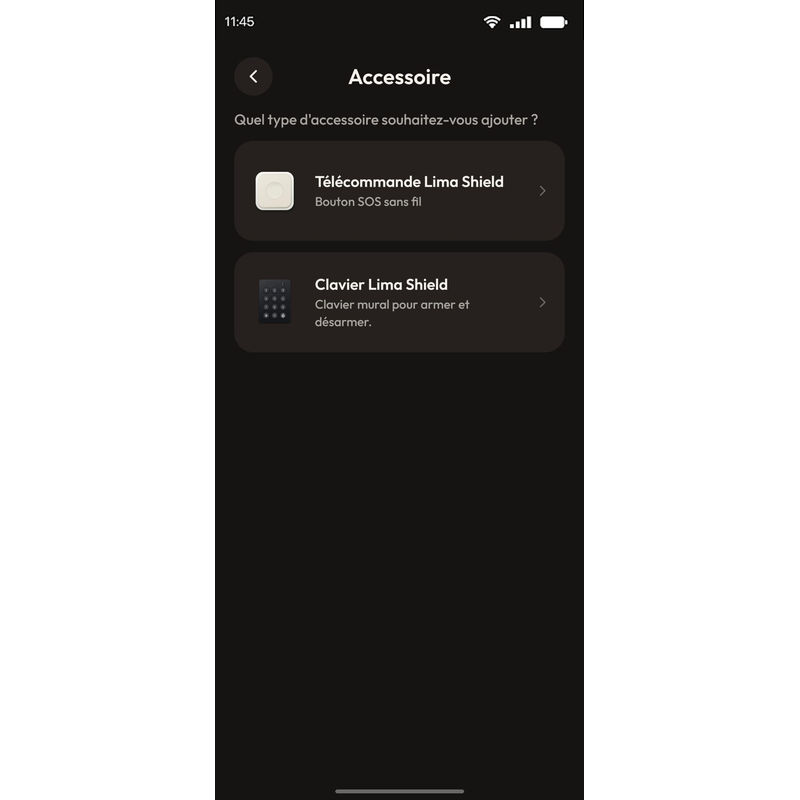
Choose the keypad.

Tap “Lima Shield Keypad”.

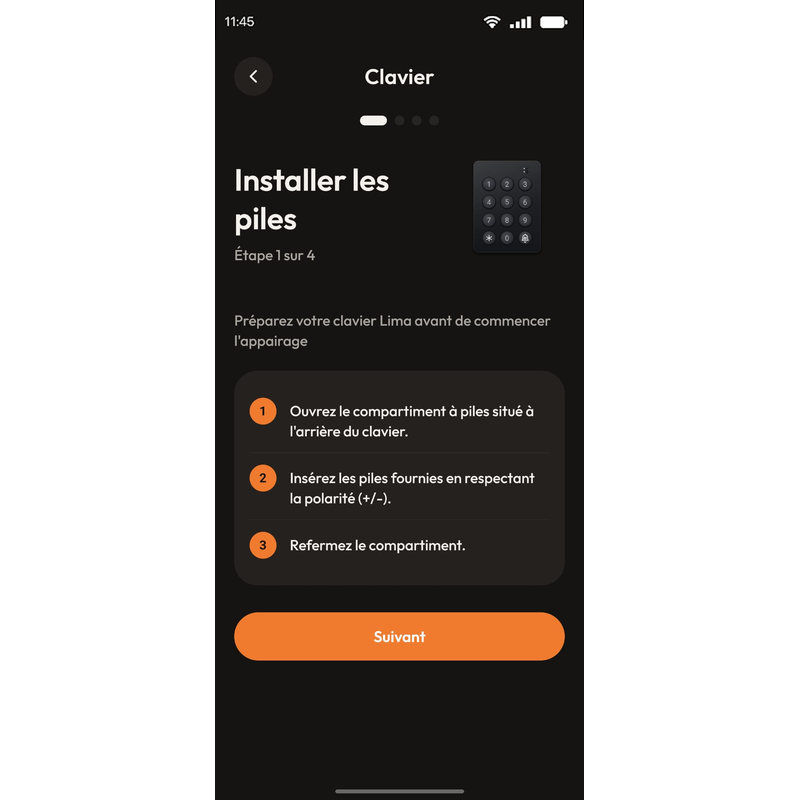
Figure 51: Installing the keypad batteries, step 1 of 4

Insert the batteries.

Open the battery compartment on the back of the keypad, insert the supplied batteries with the correct polarity (+/−), then close it.

Figure 52: Keypad pairing mode, step 2 of 4

Put it in pairing mode.

Hold down the 0 key for 5 seconds, until you hear 3 beeps. You then have 30 seconds to tap “Search for keypad”.

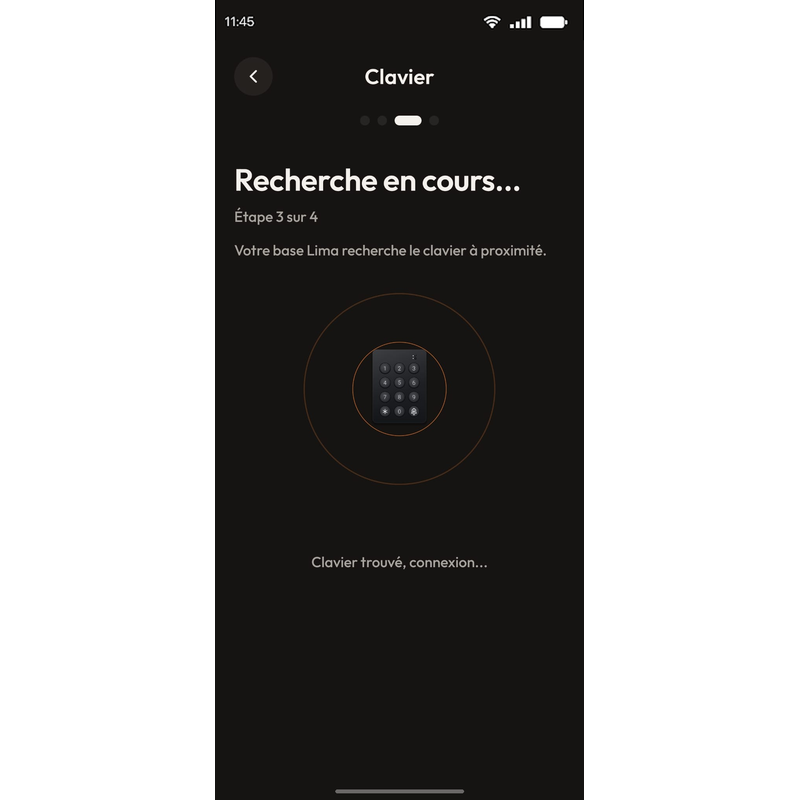
Figure 53: Searching for the keypad, step 3 of 4

Let it search.

The Lima Shield searches for the keypad nearby. When it finds it, the connection is made automatically.

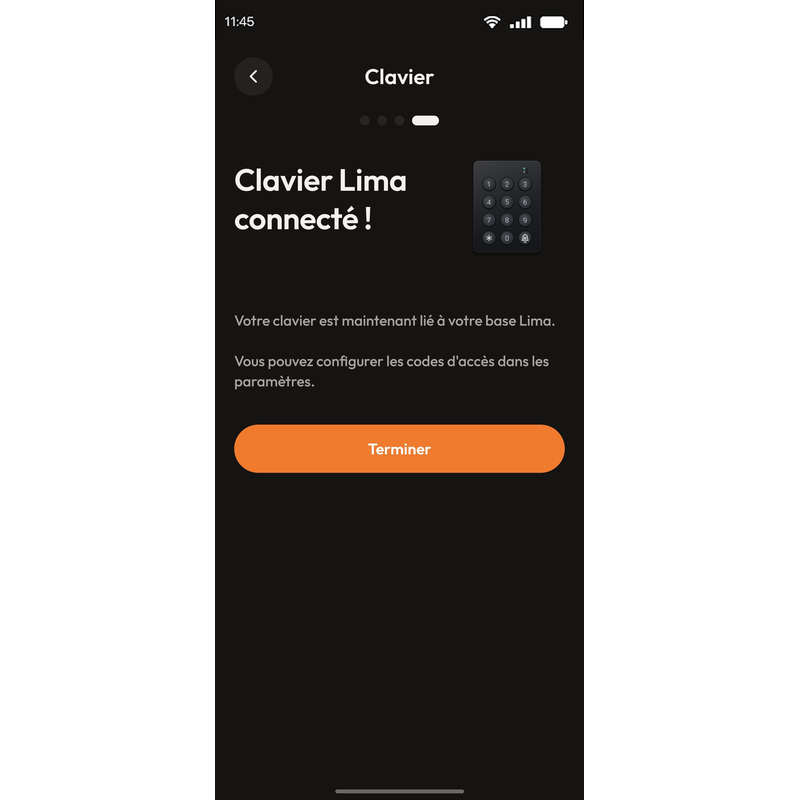
Figure 54: Keypad connected
Figure 55: The remote control and the keypad in the accessories

The keypad is connected.

Tap “Finish”. It appears in your accessories, where “Access codes” manages the keypad codes.

To arm: your 6-digit code, then the bell key at the bottom right. To disarm: the code alone.